
Worm humus on the farm: how to set up vermicompost step by step
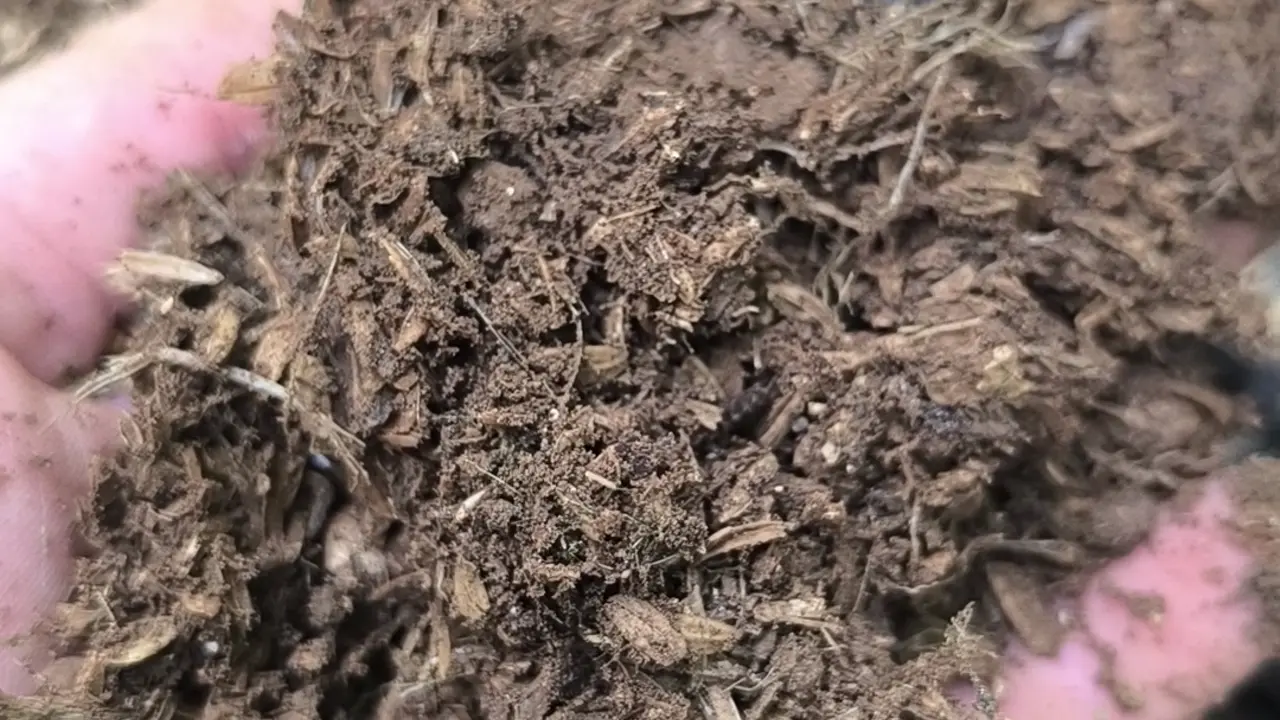
If your farm has manure, green pruning residues, unsold harvest or straw piling up with no use, you already have the raw material of one of the most rewarding homemade bio-inputs there is: worm humus. You do not need a shed or a large investment. You need to understand what the worms need, set up a well-thought-out bed and stay consistent.
In this article we explain how we approach it in the field: which worm to use, how to prepare the bed, how to feed it, when to harvest and how vermicompost fits into a regenerative agriculture strategy that makes you more autonomous and less dependent on what you buy in.
What worm humus is and why it deserves a place on your farm
Worm humus (or vermicompost) is the material that remains after worms digest organic matter that is already partly broken down. The result is a dark, loose substrate that smells like forest soil and is very rich in microbial life.
Why do we like it on a farm?
- It uses what you already have: manures, plant residues and by-products that are a problem today become a resource.
- It brings biology, not only nutrients: its value lies in the microbial activity and in the structure it helps create in the soil.
- It is easy to scale little by little: you can start with one bed and expand when you see results.
- It complements other bio-inputs: it sits well with bokashi and mountain microorganisms in the same biofactory.
It is not a miracle product. It is one more tool that, used well, improves the soil season after season.
Which worm to use
Red Californian worm (Eisenia fetida)
It is the species most used for vermicomposting. It lives in the surface layer of the organic matter, reproduces quickly and tolerates bed life well. Note: it is not the earthworm you see when you dig in your plot. Those deep-soil worms are not suited to a composting bed, and the other way around: the red Californian worm does not replace the worms in your soil.
How many you need to start
You do not need to buy large quantities. The worms multiply if conditions are good. It is better to start with a small, well-kept bed than with many metres you cannot look after.
How to set up the bed step by step
1. Choose the place
- Shade or half-shade: direct sun dries and heats the bed.
- Good drainage: waterlogging kills worms.
- Close to where you generate the organic matter and to a water point, so that handling is convenient.
- Protection from birds, voles and ants (a mesh or a straw cover helps).
2. Prepare the base
You can work on the soil, on a layer of straw or woody residues, or in boxes. A long bed about one metre wide is comfortable to work from both sides without stepping on it.
3. Use organic matter that is already mature
This is the most common mistake: putting fresh manure on straight away. Fresh manure can heat up and release ammonia, and that drives worms out or kills them. The ideal is manure that has rested for several weeks or been pre-composted, mixed with plant material (straw, leaves, shredded harvest residues).
4. Release the worms and cover
Place the worms on the surface and let them go down on their own. Cover with straw, jute sacks or damp cardboard to keep humidity and darkness.
Day-to-day management: moisture, feed and temperature
Moisture
The field rule is simple: if you take a handful and squeeze it, a few drops should fall. If it streams, it is too wet. If nothing falls, it is dry. In summer, with heat and wind, watering the bed is what you will watch most closely.
Feed
- Add thin, frequent layers rather than a large amount all at once.
- These work well: rested manures, vegetable leftovers, moistened straw, coffee grounds, cardboard without inks.
- Avoid or limit: leftovers with a lot of fat, meat, citrus and onion in excess, and any material treated with chemicals.
Temperature
Worms work better at mild temperatures. In high summer look for shade and watering; in winter, a thicker straw cover helps the bed not to stall.
Signs that something is wrong
- Bad smell or flies: too much feed or moisture. Stop feeding for a few days and add dry material.
- Worms on the surface or escaping: uncomfortable conditions (ammonia, heat, pH). Check the last thing you added.
- A bed that does not advance: lack of moisture or feed.
When and how to harvest the worm humus
The humus is ready when the material looks even, dark and granular, and you no longer recognise what you put in. The time depends on the climate, the feed and the management, so watch the material more than the calendar.
A practical way to separate the worms: stop feeding one area of the bed and put fresh food in the adjoining area. In a few days most of them will have moved and you can take the humus from the part without food. Then let it air in the shade and keep it moist, without drying out completely, so you do not lose the life it contains.
Worm leachate
If you work in boxes with drainage, you will collect a liquid at the base. That leachate is not the same as a well-made humus tea: it can carry unfinished material. If you use it, do so diluted and always after trying it on a small area.
How to use vermicompost on the farm
- Seedbeds and transplants: mixed into the substrate, it helps the plant start in an active biological environment.
- Planting holes in fruit trees and woody crops.
- Placed along the row in vegetables.
- As an inoculum to activate other composts or bio-inputs in the biofactory.
The dose and the timing depend on the crop, the soil and what you already apply. That is why it is worth trying first on a small plot, comparing with a control area and adjusting. If you want to know how to set up that comparison, we explain it in our article on field tests to measure soil health.
Vermicomposting inside a strategy for autonomy
A worm bed on its own does not transform a farm. What works is integrating it into a design: what organic matter you generate, which bio-inputs you need, when you need them and how you produce them yourself. That is where bokashi and the biofactory, mountain microorganisms, integrating animals and reading your own soil come in. You have the full picture on our page about the biofactory of bio-inputs and, if your farm is here, in regenerative agriculture in Catalonia.
Xavier Vélez, founder of True Regenerative, has worked in regenerative agriculture since 2013 across different crops, soils and forms of management. What we do is diagnose the farm, design the plan with you and put it into practice at your side in the field until you can carry it on your own. We measure to check and adjust, not as an end in itself. The idea is that you depend less on the outside, not that you come to depend on us.
Be the one who does it.
Want to set up your biofactory on the farm?
Si quieres producir tus propios bioinsumos (humus de lombriz, bokashi, microorganismos de montaña) adaptados a tu cultivo y a tu manejo, escríbenos y vemos tu caso. Si eres una empresa con fincas propias o proveedoras, mira cómo trabajamos en For companies.
Sources
- Edwards, C. A., Arancon, N. Q. and Sherman, R. (eds.) (2011). Vermiculture Technology: Earthworms, Organic Wastes, and Environmental Management. CRC Press.
Prefer to talk?
Book 30 minutes on Google Meet and let’s talk about your farm.
Cómo lo trabajamos en tu finca: Biofactory and bio-inputs
Book a first call (30 min)